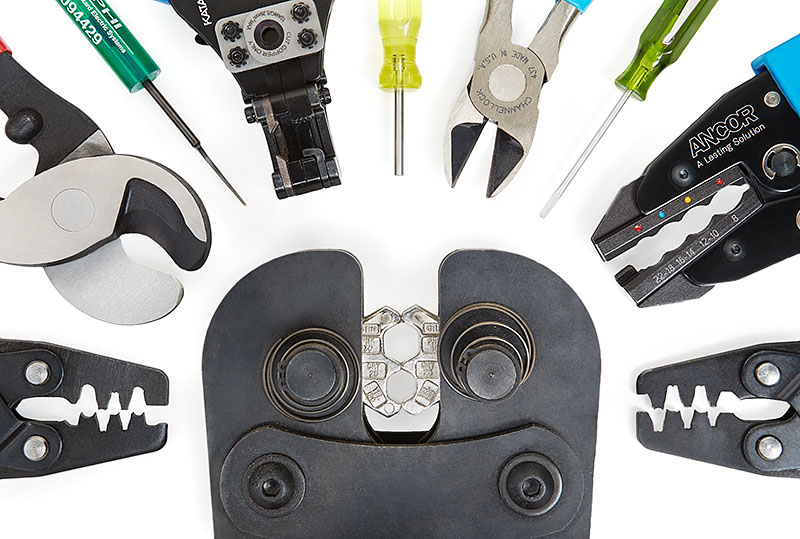
This is part 3 in a series of tutorials teaching you how to build a Bussmann RTMR fuse/relay block. In previous parts, we’ve discussed what the Bussmann RTMR is and why you would want one. I’ve also outlined all of the necessary parts and where they can be purchased. In this part, I’m going to discuss the various tools and techniques needed to complete this project.
TOOLS
There are a few specialty tools that you’re going to need for this project. Let me outline them first. Afterwards, I’ll demonstrate some specific techniques that are required. To start, here’s a list of tools you’ll need to complete this project:
- Wire cutters
- Wire strippers
- Crimpers
- Terminal removal tools
- Soldering iron
- Heat gun
And as a reminder, I take no responsibility for damage, accidents, or injuries resulting from the fabrication or installation of any electrical modifications to your vehicle. You do so at your own risk.
WIRE CUTTERS
Cutting wire is a very basic technique. I should probably not even say anything, but I want to point out that you’ll need two different types of cutters. You’ll need a general purpose wire cutter, also known as a dike, such as the following. This will be used for cutting all of your small wiring used in this project, 18-10 AWG.

You’re going to also need a large gauge wire cutter to cut the main power and ground wiring, which will be 4 gauge. I use a QuickCable 9″ QuickCutter 1 Cable Cutter, Part #4275, that you can buy from Century Tool & Equipment. This particular cutter can cut up to 2/0 AWG wire.

Of course, these specific tools are not required. As long as you have something that will sufficiently cut your wire, you’re good to go.
WIRE STRIPPERS
Stripping wire is not very difficult either. However, there are definitely good wire strippers and poor ones. I’ve been through my fair share of bad wire strippers over the years, so the cost of a good quality wire stripper is well worth it.
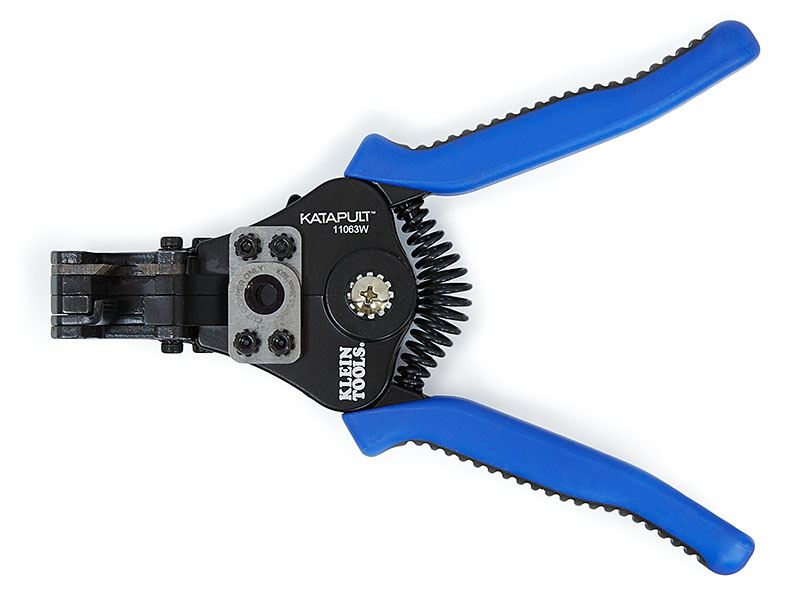
I highly recommend getting a wire stripper that not only cuts the insulation, but also removes it at the same time. It can really speed up the process when cutting many wires. I personally use the Klein Tools Katapult® Wire Stripper/Cutter, Part #11063W, which can strip 22-8 AWG wire.
In addition to one of the above stippers, you’re going to need a way to strip the insulation off of larger gauge wire. You can always use a utility knife, but you run the risk of cutting strands of wire. Therefore, a stripper such as a QuickCable Quickstrip Cable Stripper Tool, Part # 4215, is the perfect tool for the job. This can be purchased at Century Tool & Equipment.

CRIMPERS
This project involves several types of terminals, Metri-Pack, Weather-Pack, heat shrink ring terminals, and lugs. Therefore, a variety of crimpers is needed to complete this job.
Metri-Pack and Weather-Pack T-18 Crimper

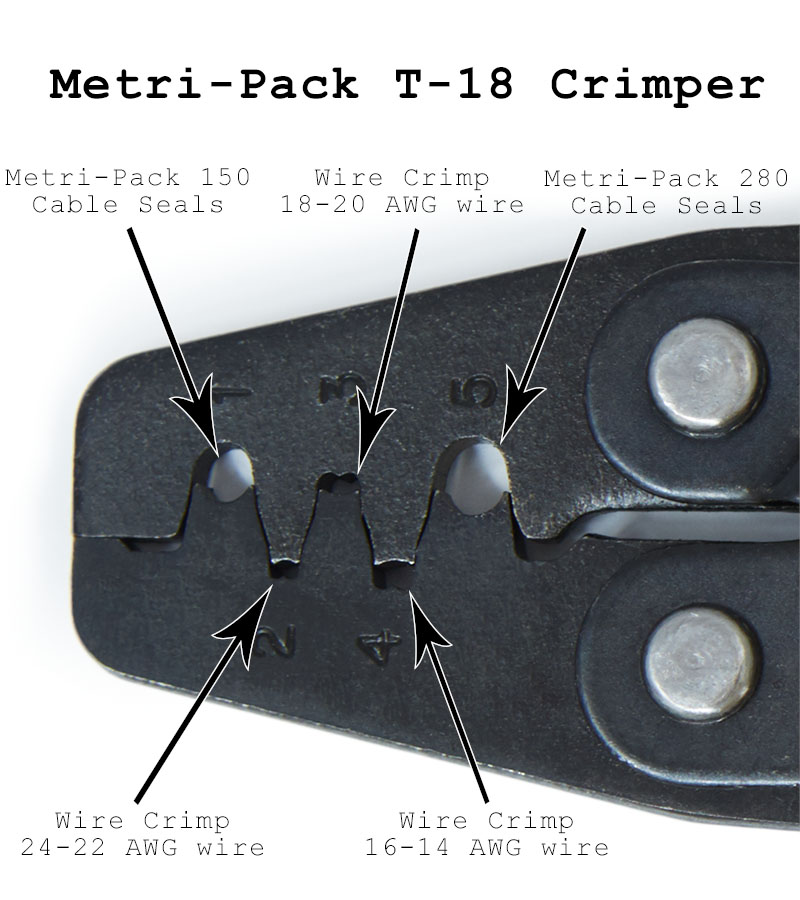
In order to crimp Metri-Pack and Weather-Pack terminals, you’ll need a special crimper. The T-18 crimper is a low-cost tool that allows you to crimp 24-14 AWG wire as well as Weather-Pack, Metri-Pack 150 and Metri-Pack 280 cable seals. This tool can be purchased from Amazon or Del City.
- Crimps Metri-Pack 150 and 280 terminals as well as Weather-Pack terminals.
- Crimps conductor and cable seals in separate cavities, requiring two crimps to complete termination.
- Cable seal crimps are “O” type and are produced in two cavities: #1 – Metri-Pack 150 and #5 – Metri-Pack 280 and Weather-Pack.
- Conductor crimps are “B” type and are produced in three cavities: #4 – 16-14 AWG, #3 – 20-18 AWG and #2 – 24-22 AWG.
Open Barrel T-11 Crimper
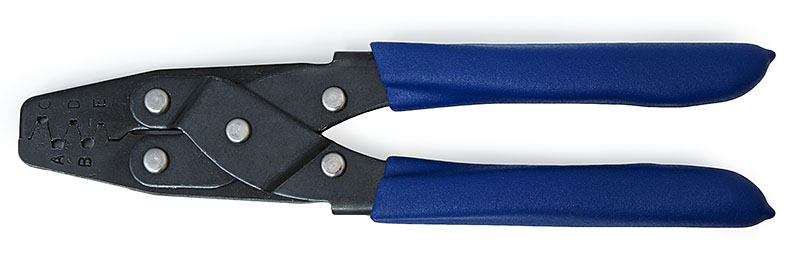
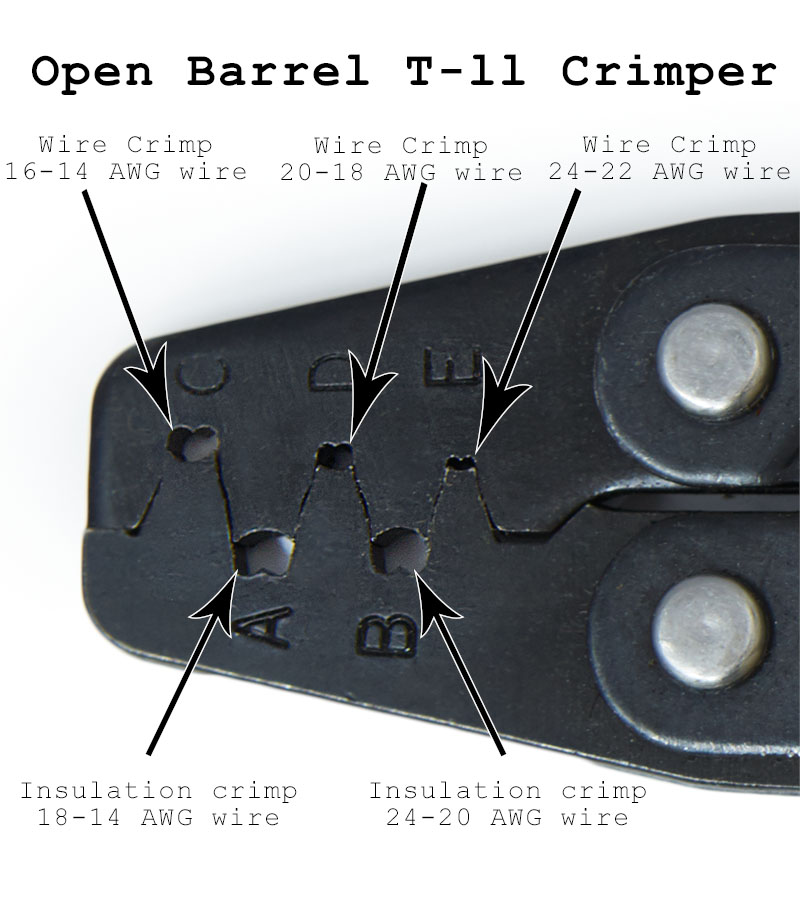
In this tutorial, I’ll be using 10 AWG wire. In order to crimp the cable seals for this sized conductor, the T-18 crimper noted above can be used. However, to properly crimp 10 AWG terminals, you’ll need an additional crimper. Any open barrel crimper capable of crimping 10 AWG wire should suffice, but another low-cost tool is the T-11 crimper. The T-11 uses the same crimp cavities as the Delphi/Packard 12085271 tool, but is built with an inexpensive, non-ratcheting frame. This tool has a total of five crimp cavities, three of which are for conductor crimps and the other two for insulation crimps. This tool can be purchased from Amazon.
- Crimps a wide variety of open barrel contacts in medium size wire ranges.
- Crimps conductor and insulation portion of contacts in separate cavities, requiring two crimps to complete termination.
- Insulation crimps are “B” type and are produced in two cavities: A – 18-14 AWG and B – 24-20 AWG.
- Conductor crimps are “B” type and are produced in three cavities: C – 16-14 AWG, D – 20-18 AWG and E – 24-22 AWG.
Although the T-11 crimper is a tool designed to crimp open barrel terminals with 24-14 AWG wire, we can actually use it to crimp 10 AWG wire. This is possible because we don’t need a tool to do any open barrel insulation crimps. Furthermore, the “B” cavity is the proper shape and size for a 10 AWG conductor crimp. The following table lists which cavity to use for a specific wire gauge.
T-11 Crimper Settings
| Wire AWG | Conductor Crimp Cavity | Insulation Crimp Cavity |
|---|---|---|
| 24 | E | B |
| 22 | E | B |
| 20 | D | B |
| 18 | D | A |
| 16 | C | A |
| 14 | C | A |
| 12 | B | n/a |
| 10 | B | n/a |
Molex Mini-Fit Jr. Crimper
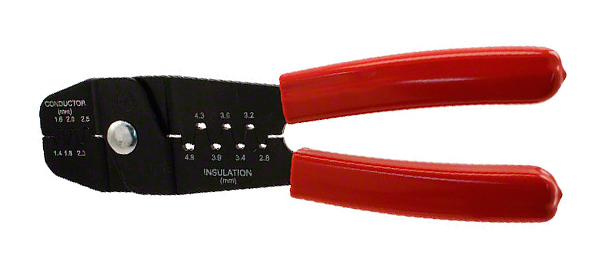
This tutorial outlines installation of switches in the overhead console sunglass holder, so I will not be using switchbacks. Therefore, to allow the switches to be removed for any reason, I needed some sort of connector. I chose Molex Mini-Fit Jr. connectors. As an alternative, you could use male and female quick disconnects if you would like to save some money and not buy another tool.
The Molex Mini-Fit Jr. terminals are extremely small and need a special crimper to accommodate them. This is the inexpensive version and can be purchased at Amazon or Mouser.
Heat Shrink Terminal Crimper
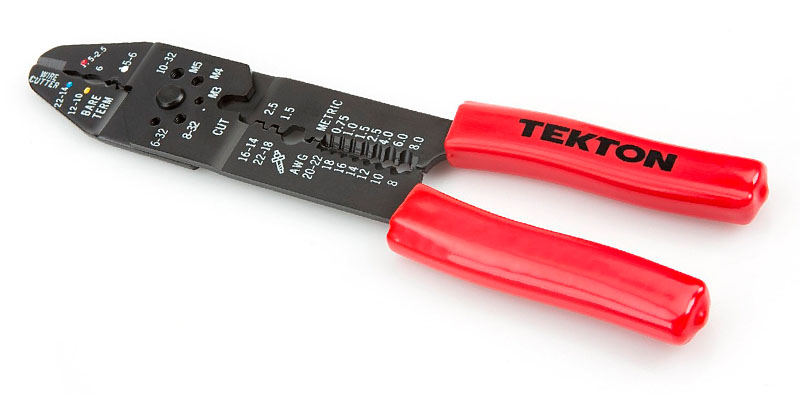
You’re going to need a crimper for heat shrink insulated terminals. A very basic and low-cost crimper is the TEKTON 3775, available from Amazon.
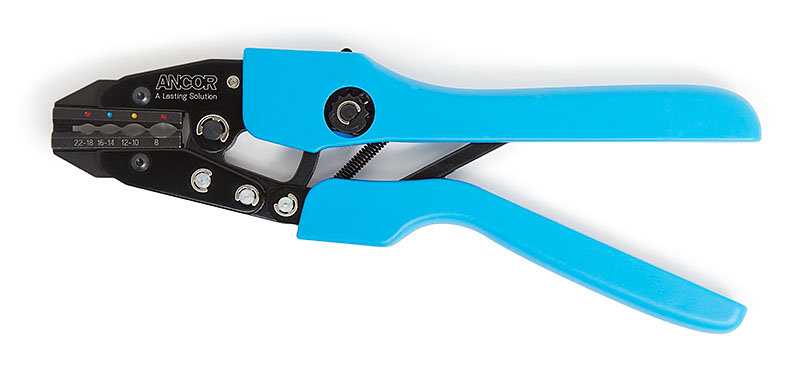
For more consistent crimps, you can use a ratchet crimper. Although not a requirement, this style crimper ensures a proper crimp, because it requires the tool to be fully closed before the automatic release opens.
If you decide to purchase a ratchet crimper, you need to know that there are several types of ratchet crimp tools. Since we are using heat shrink terminals in this project, you’ll need a Single Crimp ratchet tool versus a Double Crimp ratchet tool.
A good choice is the Ancor 702010 Marine Grade Electrical Single Crimp Ratchet Tool, which can be purchased at Amazon.
Large Gauge Lug Crimper
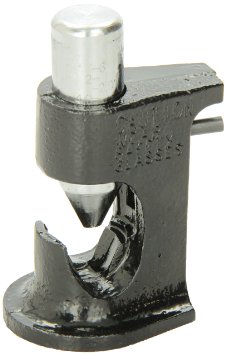
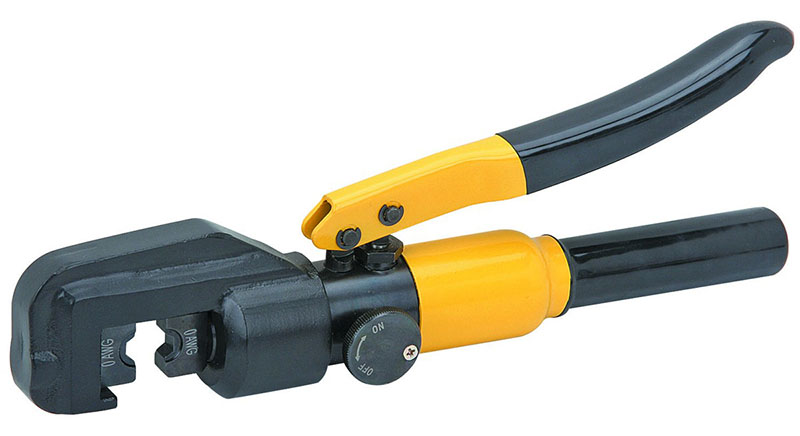
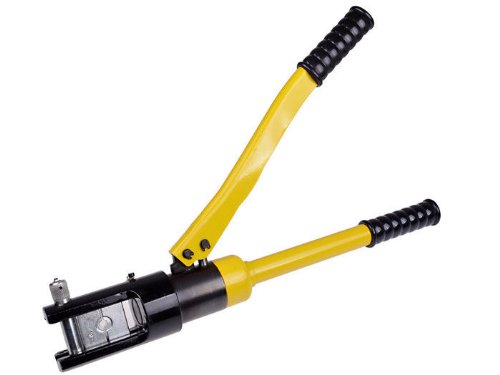
To crimp lugs onto larger gauge wire, you’ll need a heavy-duty crimper. There are several options in different price ranges that will allow you to crimp these lugs.
E-Z Red B790C Hammer Indent Crimper Tool available at Amazon
Hydraulic Crimper available at Harbor Freight
TMS 16 Ton Hydraulic Crimper available at Amazon.
E-Z Red B795 Crimper available at Amazon.
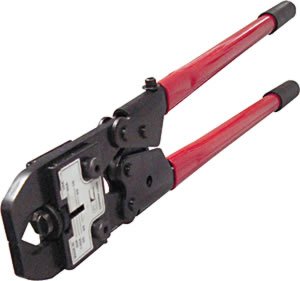
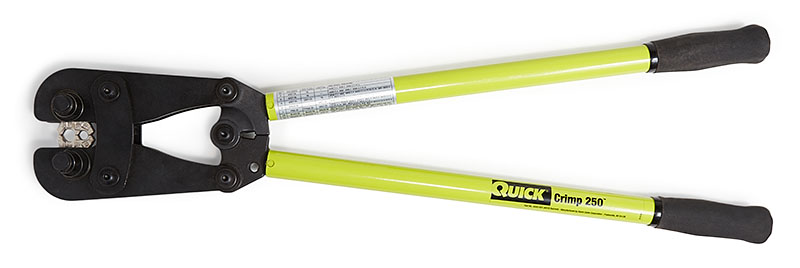
Finally, there’s the Quick Cable 4255-001 crimper available at Battery Mart, which is what I use.
TERMINAL REMOVAL TOOLS
These are not required tools, but if you make a mistake and need to remove a terminal from the Bussmann RTMR or a connector, you’re going to need a Terminal Removal Tool. Each different type of connector has a specific terminal removal tool.
Metri-Pack Removal Tool
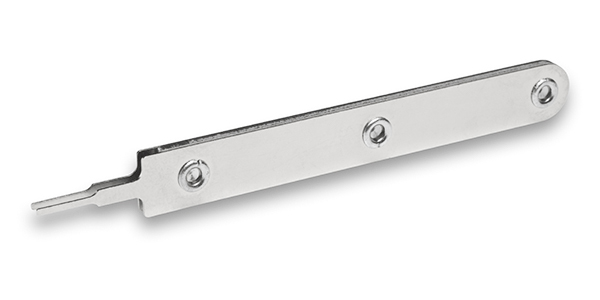
The Metri-Pack Removal Tool is made to specifically remove Metri-Pack terminals from their connectors. This can be purchased at Waytek Wire.

I found that the removal tool works as intended when removing tanged terminals from Metri-Pack connectors. However, when trying to remove terminals from the Bussmann RTMR, it’s actually too small and simply isn’t strong enough. I struggled for a long time using the official removal tool, all the while thinking that I was doing something wrong. After many failed attempts and a few successes, I figured that the tool was the problem and not me. I then grabbed a trusted friend, a small green screwdriver with a 3/32″ flat head, and it’s been easy street ever since. The Xcelite R3322 is perfect and can be purchased at Amazon.

Weather-Pack Removal Tool
A Weather-Pack Removal Tool, Delphi Part #12014012, is needed to remove Weather-Pack terminals from their connectors. This can be purchased at Waytek Wire.

Mini-Fit Jr. Terminal Removal Tool
A Molex Mini-Fit Jr. Terminal Removal Tool, Part #11-03-0044, is needed to remove Mini-Fit Jr. terminals from their connectors. This can be purchased at Mouser.
SWITCH ACTUATOR TOOL
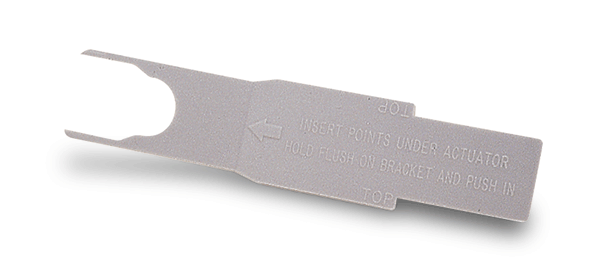
There is a special tool needed to remove Carling switches from the switch panel or to replace the switch rockers. This isn’t a required tool, but it’s so inexpensive that you might as well add this to your shopping cart when making your purchase for switches. This can be purchased at OTRATTW.
SOLDERING IRON
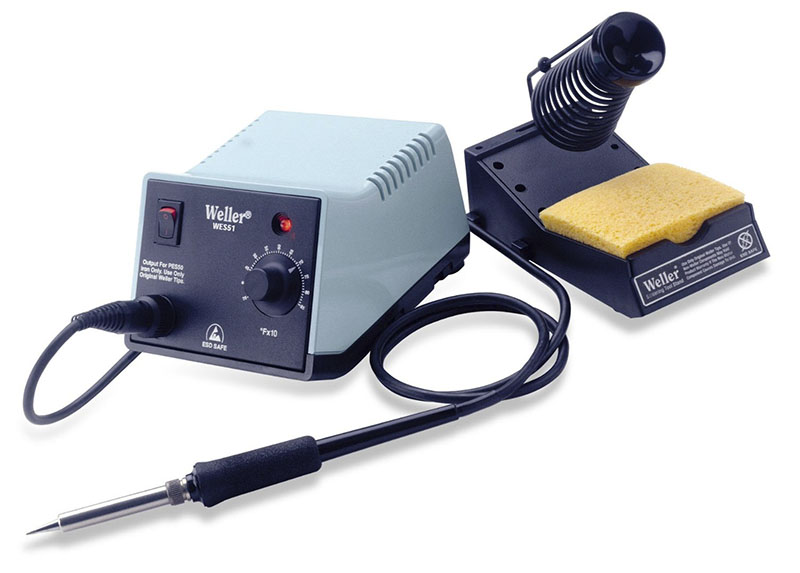
There are many different types of soldering irons available, and I’m not going to get into the specifics. I’m recommending a soldering iron to use after crimping the terminals, because we are hand crimping and not using a machine crimper. This is the soldering iron I use that I’ve had for many years. It allows me to control the temperature of the iron based on my needs. It’s a Weller STATION 50/60W 120V WES51, which can be purchased at Amazon.
HEAT GUN
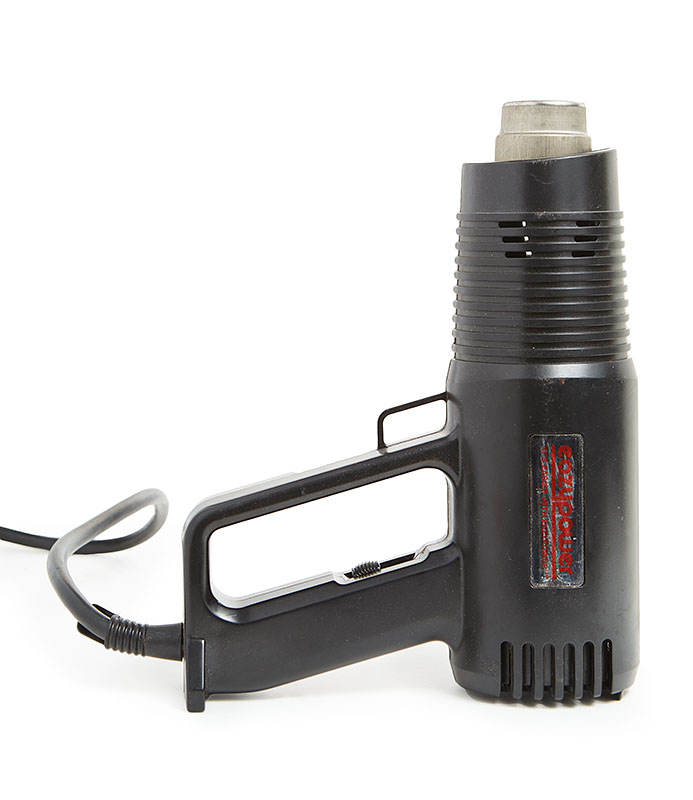
A heat gun is used to shrink tubing and heat shrink terminals. Again, there are many different types available. The one I’ve used for many years is an Eazypower Heat Gun. This is considered a low-end tool for occasional use, but it’s always done a good job for me. If you’re looking to buy one, I recommend finding one with a heat shield. This will make shrinking tubing easier and quicker.
TECHNIQUES
The actual process of building a Bussmann RTMR is very easy. It’s simply measuring, cutting, and stripping wire. Additionally, it requires crimping terminals onto these wires. With this said, I could probably forgo talking about the process and just move on to the actually building. But I think a brief discussion about how to crimp Metri-Pack and Weather-Pack terminals will be helpful.
For technical information about crimping in general, Cycle Terminal has some useful information. Additionally, Molex offers their Industrial Crimp Quality Handbook and their Quality Crimping Handbook.
The technique of crimping terminals is very easy. I’ll demonstrate with 10 AWG wire and Metri-Pack terminals. The process for Weather-Pack terminals is identical. As mentioned above, I have to use two different crimpers, the T-11 for the conductor and the T-18 for the cable seal. The process for 14 AWG wire and smaller is the same, but the T-18 crimper is all that’s required.
After cutting your wire to length, start by stripping the insulation about 7/32″.
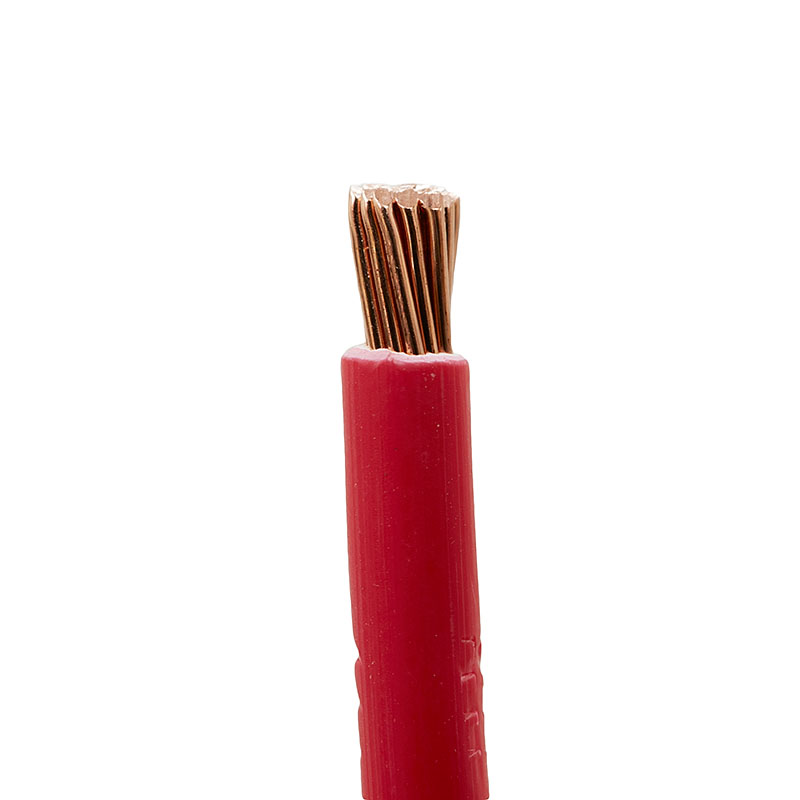
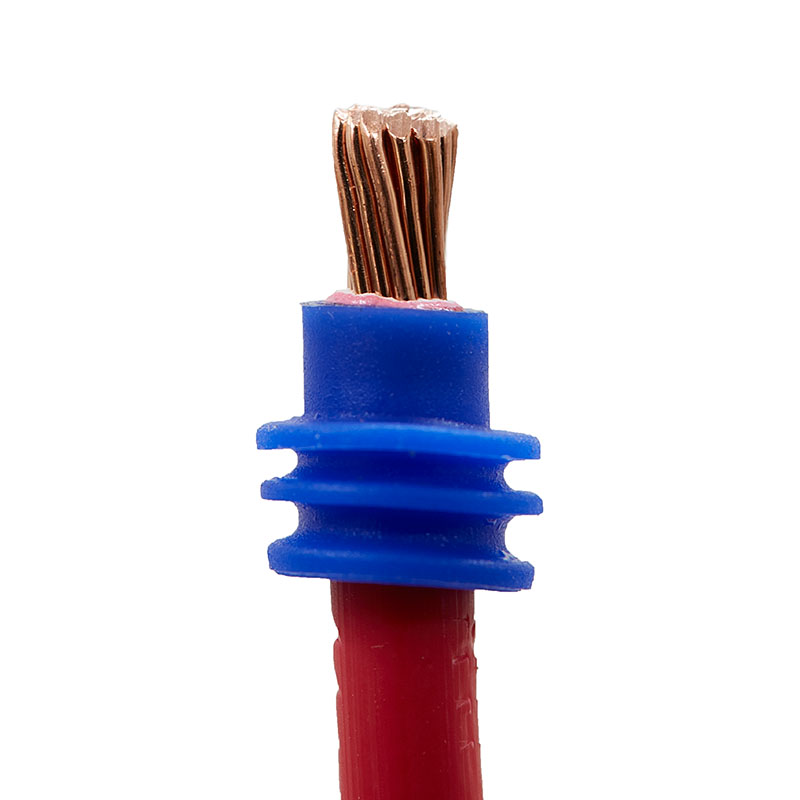
Slide cable seal into place. With small gauge wire, it might be easier to slip on the cable seal before stripping and then slide into place afterwards. Otherwise, you risk bending the conductor strands. With 10 AWG, it doesn’t matter.
Using the T-11 crimper, insert terminal into cavity “B”, aligning the tabs for the conductor, and close the jaws just enough to hold terminal in place.
Then insert wire so the cable seal is properly aligned with crimp tabs and the wire is just past the wire crimps. Complete the conductor crimp by firmly squeezing the crimper closed.
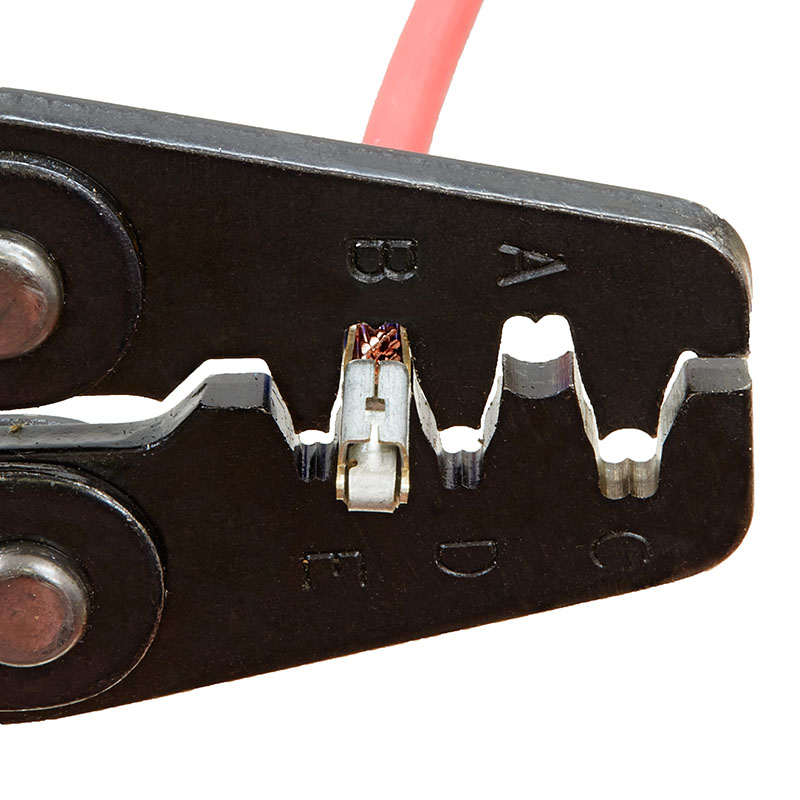 The crimp will look like this when completed. Notice that a short length of wire protrudes past the crimp. This is intended and required for a good crimp.
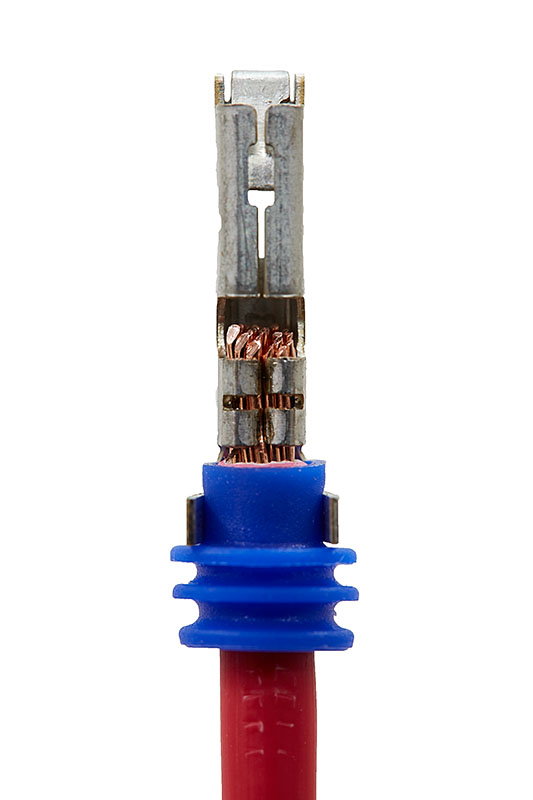
Then, using the T-18 crimper, insert the terminal into cavity “5”, aligning the tabs for the cable seal. Complete the cable seal crimp by gently squeezing the tool closed. You don’t need to squeeze the crimper as firmly as you do for a conductor crimp. Furthermore, with 10 AWG TXL wire and blue cable seals, you need to be careful not to crimp too firmly. Otherwise, you risk splitting the seal.
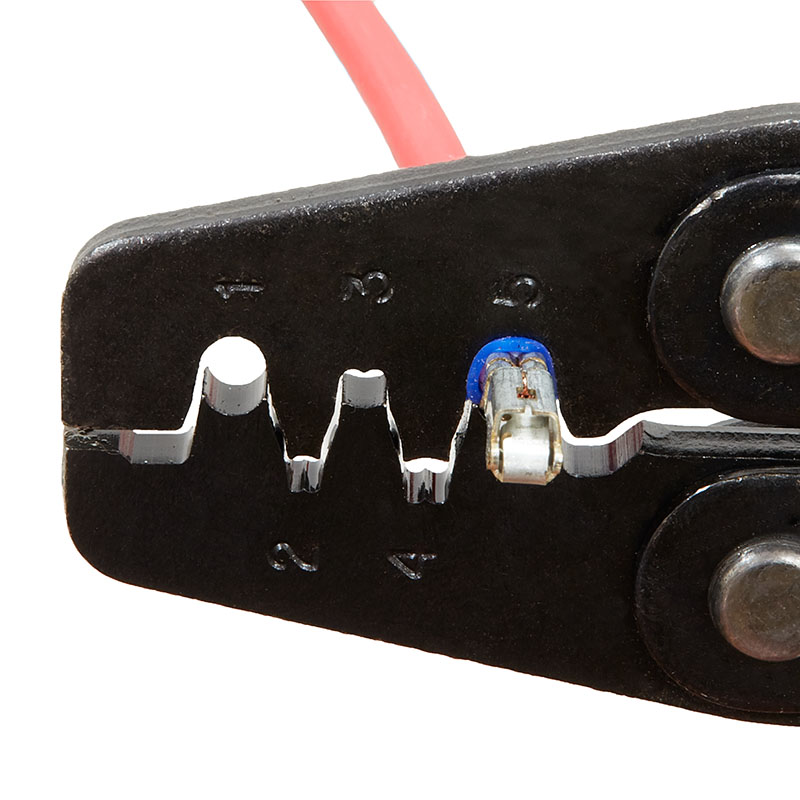 It will look like this after crimping the cable seal.
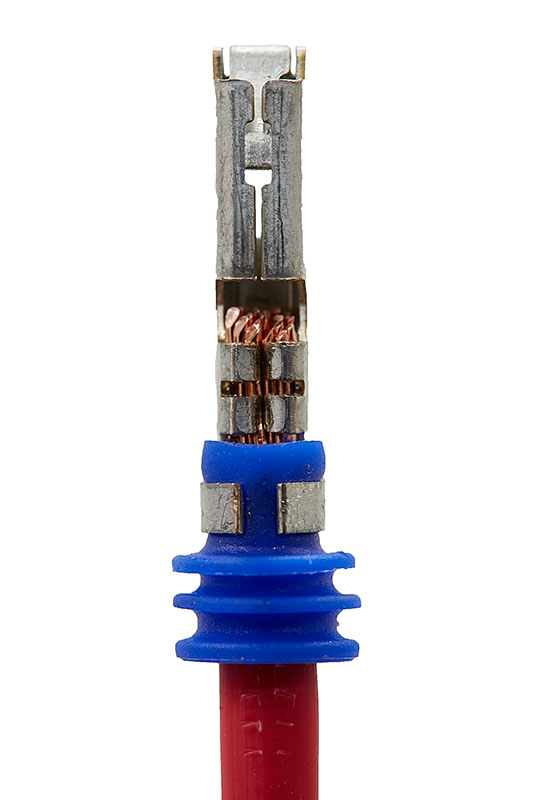
As demonstrated, I needed to use two different tools when terminating 10 AWG wire. However, when using 18 AWG wire, the T-18 is all that’s needed. You would simply use cavity “3” for the conductor and cavity “5” for the cable seal.
One last tip, because we are using a hand crimper instead of a machine crimper, it’s recommended to solder the terminals. If you choose to solder, this would be the time to do so.
CONCLUSION
This part has outlined all of the necessary tools you’ll need to build the Bussmann RTMR. It’s also shown you how to crimp Metri-Pack and Weather-Pack terminals. Next, in Part 4 – Wiring and Schematics, I’ll get into the details of the Bussmann RTMR and the wiring connections.
